Kennet
6
10/01/2008
No, the paint didn't take 4 days to dry! I've been tied up repairing the chipper belonging to a friend who owns one of the local fish and chip shops. It's as old as me and has finally given up the ghost so I 'volunteered' to have a look at it for him. The bearings etc are completely shot so it needs a complete rebuild. Still, it will be a paying job and all donations to the model engineering fund will be gratefully received!
I've re-assembled the grinder after painting and it now looks quite smart. I used smooth Hammerite - not my favourite paint but the choice of brush on paint at our local car spares shop is a bit limited. The range of colours was pretty limited as well but at least the grinder fits in with the mill!
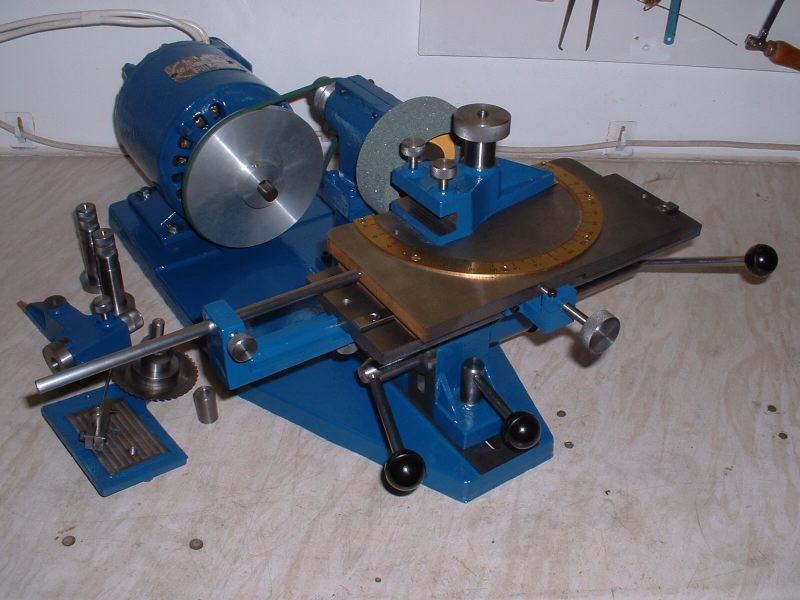
Painted and re-assembled
I've completed the rest of the bits for the slitting saw holder which consisted of the arbor that holds the saws and a detent to locate the teeth of the saw blade. There was no material provided for the 'blade' of the detent so I used a bit of springy steel.
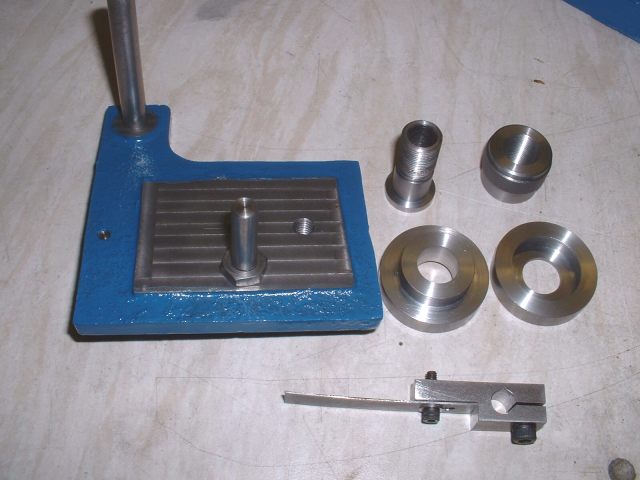
Parts for the slitting saw holder
The two flanges, one with a spigot and one with a recess, clamp the saw blade between them and need to be made to suit the bore of the blades so more than one pair need to be made if you have different bore saws. I made mine to suit my larger 1" bore saws. I do have some 3/4" bore saws but I think the teeth are probably too small to be sharpened. It might be possible with a very thin grinding wheel?
The final jobs on the machine are to true up all the grinding wheels in situ and to engrave the pointers on the tool holders and the table.
I had a quick go at the pointer on the lathe tool holder and this was easy enough to do. I just clamped a square in the tool holder with the stock touching the back of the slot and held the blade across the front of the grinding wheel. The tool holder was then clamped tight when the blade was touching both sides of the wheel. A line was then deeply scribed on the pointer in line with the 0 degree mark on the circular scale. That's that one done!
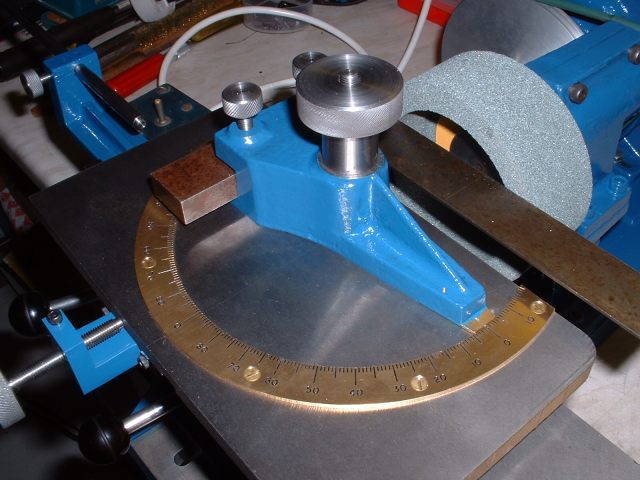
Setting the tool holder square to the wheel and marking the pointer
Back to the chipper!