3
25/05/2012
Well, it was too hot to work in the garden in the afternoons so I set about remachining the wheels. I did the bogie wheels between centres as the axles had been countersunk on the ends. Driving the wheels was a problem as I didn't want to press the wheels off but I got around that by fitting the 4 jaw chuck as well as a centre in the lathe spindle and managed to grip the outside of the wheel nearest the headstock by carefully tightening the jaws. I found a carbide tipped lathe tool with the right tip radius to suit the root radius of the tread and carefully thinned down the flanges. I had to take about 0.030" off each one to get the flanges to width. The flanges are a little deeper than the recomendations but I'll leave them as they are for now. The flange tips should still be strong enough.
Next I looked at the tender wheels and the back to back on these was about 0.030" too big. I think these are the worst of the lot and must have been very tight on the rails. Before tackling these, I made a wheel gauge as described by Dr. Martin Baker in Engineering in Miniature (Volume 15 Issue 9) so I could easily check that the flanges would be correct. This is basically just a length of bar with two grooves machined in it the correct width and distance apart. If the flanges fit in the grooves with a bit of sideways play they should be ok on the track.
Machining the tender wheels was a bit more difficult as the axles were not centred. This time I held the end of the axle in a collet in the lathe spindle and supported the tailstock end in a drill chuck used as an improvised steady. Again, the wheels were driven using the 4 jaw chuck. These wheels needed a bit more off the flanges due to the increased back to back which resulted in the flanges being quite thin at the edge. As the flanges were too deep anyway I just turned the flanges down in diameter which thickened the tips up nicely.
Yesterday I took the front bogie and the tender down to the track for a test 'fit'. They ran very freely this time with plenty of sideways clearance between the flanges and the rails. Just the loco wheels to do now!
06/06/12
I've been busy in the garden again getting the veg planted but I've now managed to reprofile the loco driving wheels and the trailing truck wheels. One of the truck wheels was loose on the axle so that was cleaned up and Loctited back on before machining.
To get the driving wheels out I removed the boiler first. This needs to come off anyway for the cladding to be fitted so that was no hardship. The connecting rods, coupling rods, return cranks, and pump eccentric straps were removed and then the wheels could be dropped out. The back to back dimension on the leading driving wheels was quite a bit undersize so I only had to take a slight skim off the flanges for the wheel gauge to fit. The flanges on the driving and trailing wheels weren't that much oversize and only needed about 0.010" taking off. I think it was the bogie and tender wheels that were causing most of the problem. I'll take the chassis to the club next time I go and try it around the track.
The driving wheels etc. are now refitted so I can now look at refitting the boiler cladding. I want to try and improve the ashpan if I can as it's hopeless as it stands. I reckon I can make it deeper at the sides and in the centre which will make emptying it and dropping the fire a lot easier. Then there's the lubricator to sort out.
15/03/2013
Now the workshop is up and running I can get back to some of the projects that have been on hold!
When I ran the loco at the track last year I noticed that the regulator was very stiff and difficult to operate so I decided to alter it. I've fitted the revolving disc with a Peek face to reduce friction and changed the original spring, which turned out to be brass, with a lighter stainless steel one removed from a spray bottle. I also reduced the diameter of the disc slightly as it was catching on the inside of the tube at one point.
The PEEK disc has a square hole on the centre to match the square on the end of the operating rod (which was lengthened to suit) but I also put a couple of small stainless pins between the PEEK disc and the original brass one. The regulator now moves very smoothly and has been fitted back into the boiler. I'm hoping to take the boiler to the club next week and get the official hydraulic test completed and a certificate issued. Under the new regulations, as well as the twice working pressure test on the bare boiler, it's now necessary to have a second hydraulic test at 1.5 times working pressure with all the fittings attached.
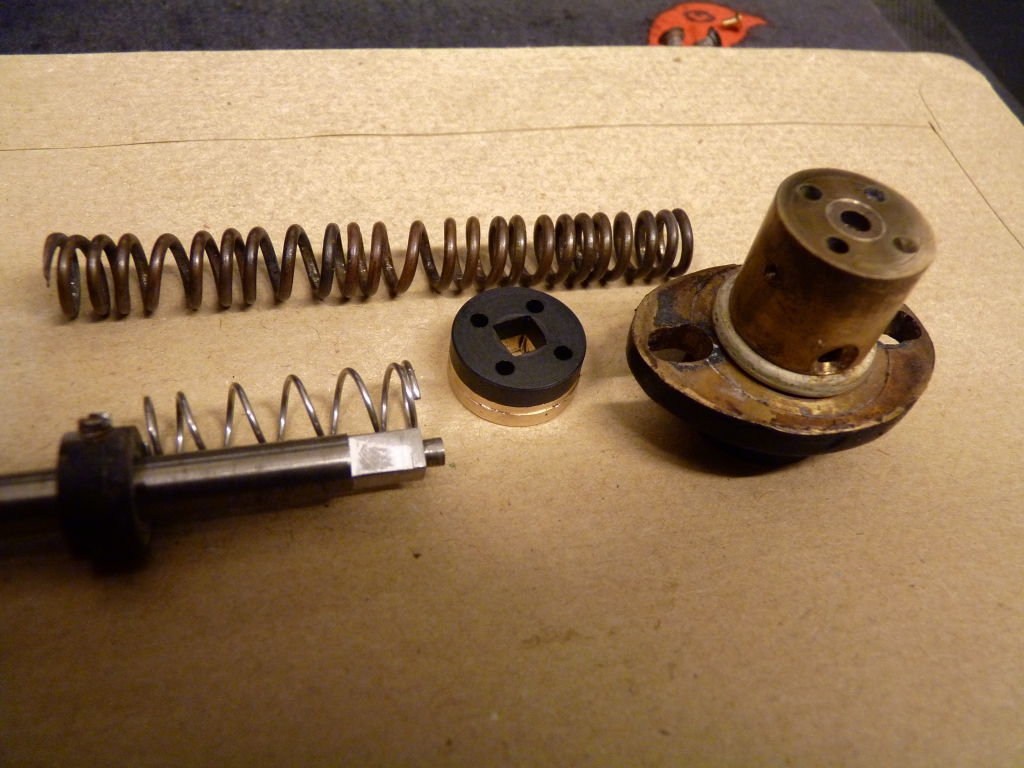
Modified disc with new spring (old one in background)
21/03/2013
Took the boiler to the club today for it's official 1.5 times working pressure test with all the fittings and superheater in place. It passed with no problems so the boiler can now have the cladding refitted.
10/09/2013
After another long break doing other things (including rebuilding a 5" Minx chassis!) I'm finally back on the Princess Royal. I'm refitting the cladding at the moment which has involved making a new throatplate section. This was beaten up out of 18swg copper and was a devil of a job to get to fit! I finished up cutting it in half vertically and fitting each half separately. The original throatplate cladding was soft soldered to both the firebox cladding and the boiler barrel cladding but the new will be held to the firebox cladding with 10BA roundhead brass screws to make it easier to remove in the future.
I've also made a new ashpan which is deeper than the original and allows the centre part of the grate to drop down further, hopefully making cleaning out the old fire easier. The sheet material for this came from friend Dennis's workshop clearance and I think it may be Inconel!
Once the cladding is all back on I can get it painted and the boiler back on the chassis. I'm going to modify the lubricator to a single ram version based on the Jim Ewins design which I rather like. Hopefully, I'll be able to use the original tank, cylinder, and drive without much alteration. That should be about it then and the loco can be ran again.
11/10/2019
I had cause to look back at this topic and realised that I never finished off the story of the Princess Royal.
Unfortunately, the owner was taken very ill and passed away a few years ago now. He left the loco to his nephews in his will so it had to go back before I got chance to run it again.
I did get the boiler cladding painted and also did a bit of touching up elsewhere to make the loco look 'nice'. I used Craftmaster enamel paint for the cladding and brush painted it over a coat of etching primer. I didn't take a great deal of care over the painting but to my surprise the cladding came out really well. I've used Craftmaster paints a couple of times now with good results. Also, it's about half the price of another well known brand of model paints and gives as good, if not better, results.
The loco will never be run and will just be a static exhibit. That is a shame but it's probably for the best considering the condition of the boiler. It would really need a new one if it were to be run on a regular basis.
So that's the second project that has come to nothing really, the first being the Kingette that got stolen!